Here’s another project that I made for my daughter. She wanted a pair of wide leg linen pants. This is another one of those 90’s styles that are back. I love seeing all the 90’s fashion revival. Our clothes were much more comfortable back then versus the super tight styles that have been popular for a while.
Pattern Used
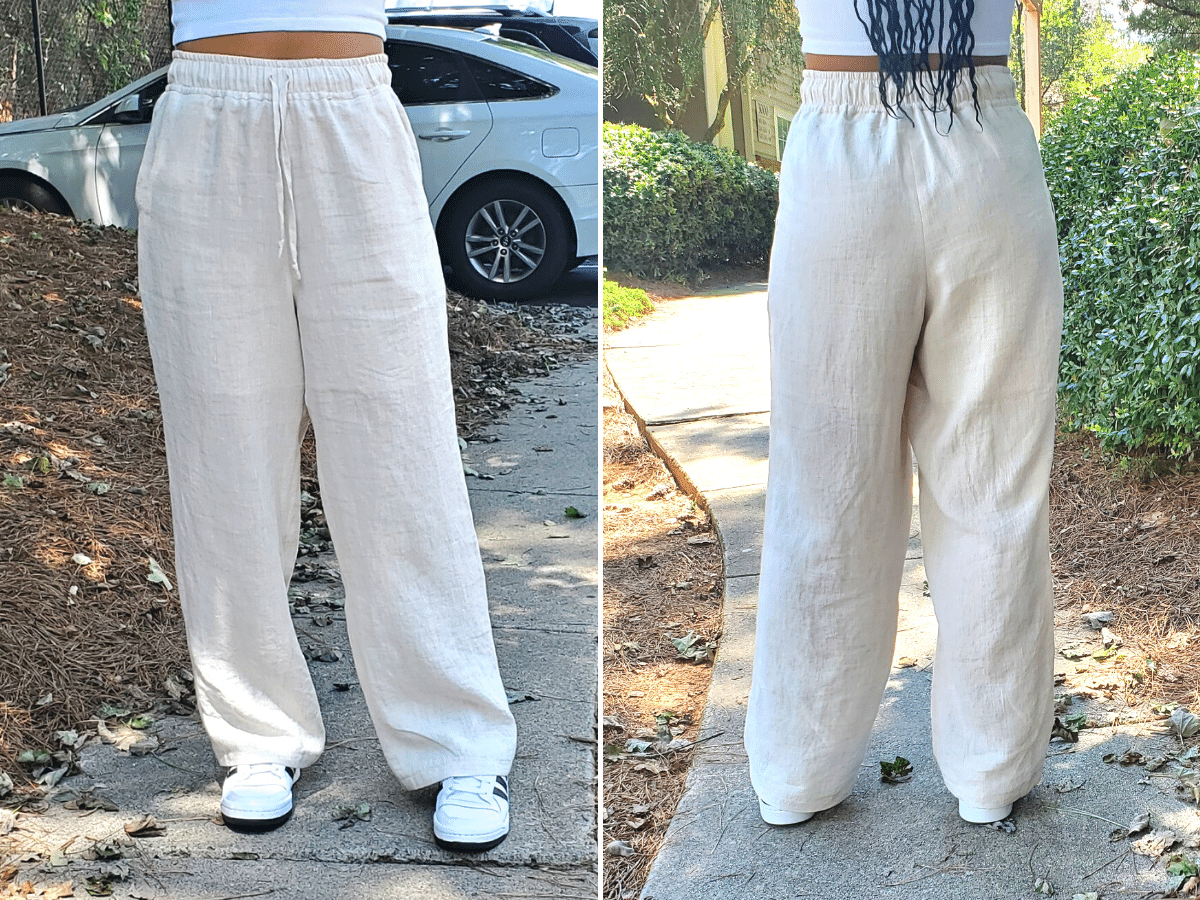
I used the Friday Pattern Co Saguara Pants. This is my first time using their patterns. If you like this style, Butterick 6750 is a similar pattern. I ended up going with Friday Pattern Company because the Butterick pattern wasn’t at my local Joann’s. I thought it would be a good time to try out a new to me Indie company. Plus, I was intrigued by the waistband treatment and wanted to give it a try. It has a very ready to wear look, that upgrades this simple style of pants.

Pattern Description
Wide leg (very wide!) crop pants, 2” wide elastic waistband with a drawstring, and hip yoke pockets. That pattern also comes with a top, but I only sewed the pants.
Pattern Sizing
This pattern comes in a large range: XS/0 – 7X/32.
Fabric Used
I had the perfect cream linen in my stash. It’s been there a while so I’m not sure where I purchased it from. I also used Bemberg lining that I purchased from my local fabric store, Gail K Fabrics. Both fabrics were great to work with and sewed up beautifully. They’re also very comfortable fabrics to wear in summer.
Pattern Comments
For fitting alterations, I did my daughter’s normal pant alterations- full butt and sway back. For design changes, I lengthened the pants to full pant length. After fitting, the pants were just way too wide. It’s pictured that way, so the pattern is true to the photo, but it was just too wide to reasonably wear. It also wasn’t the look we were going for. I ended up taking 5” out of the width in each leg.
My daughter requested a little more coverage so I added a partial lining. I drafted the lining pieces myself. To prevent shifting, I tacked the lining down with a french tack at the side seams.

The directions are clear and easy to follow. The company even has videos walking you through construction! I didn’t watch the videos so I can’t speak on them, but I think that’s a really helpful addition, especially if you’re new to sewing.
I didn’t completely follow the directions and I opted to sew the way I felt was best. I prefer to sew the crotch in the round, instead of flat, because I feel it curves around the body better. I also attached the waistband using the traditional pant method instead of the way the instructions recommend. The instructions have you attach it the way you would for sweatpants. I did follow the topstitching directions and I love how that came out. The only change is that I topstitched using a narrow zig zag instead of a straight stitch. This waistband treatment was a new method for me and I can see myself using it again. For hemming, I used a 1” topstitched hem.


Final Thoughts
I love the pants and want a pair for myself! The top looks interesting, too, but I’m not sure if it’s something I’ll make. It is nice getting a 2 for 1 pattern, though. I have some other garments in my sewing queue so it may be something for the future.
If you are looking for this style, I highly recommend this pattern. You may want to take out some of the width because it’s a really, really wide leg. But if you like that, then go for it. I didn’t follow the directions completely, but I don’t think you can go wrong following them. I would use the traditional method to attach the waistband, though. Their method may work fine, but I’m not fully confident with it.